It may happen that our Tech Support team has asked you to perform a diagnostic of your Perifit using the BLE Scanner app. BLE Scanner is a third party application that gives our engineers valuable insight on your Perifit, often helping us to find the root cause of a failure and therefore a quick and efficient solution.
Please follow this guide in as carefully as you can as this may be key to the solution to your problem. If however this guide seems to technical or not clear enough for you, please contact our Tech Support and we will be very happy to help you.
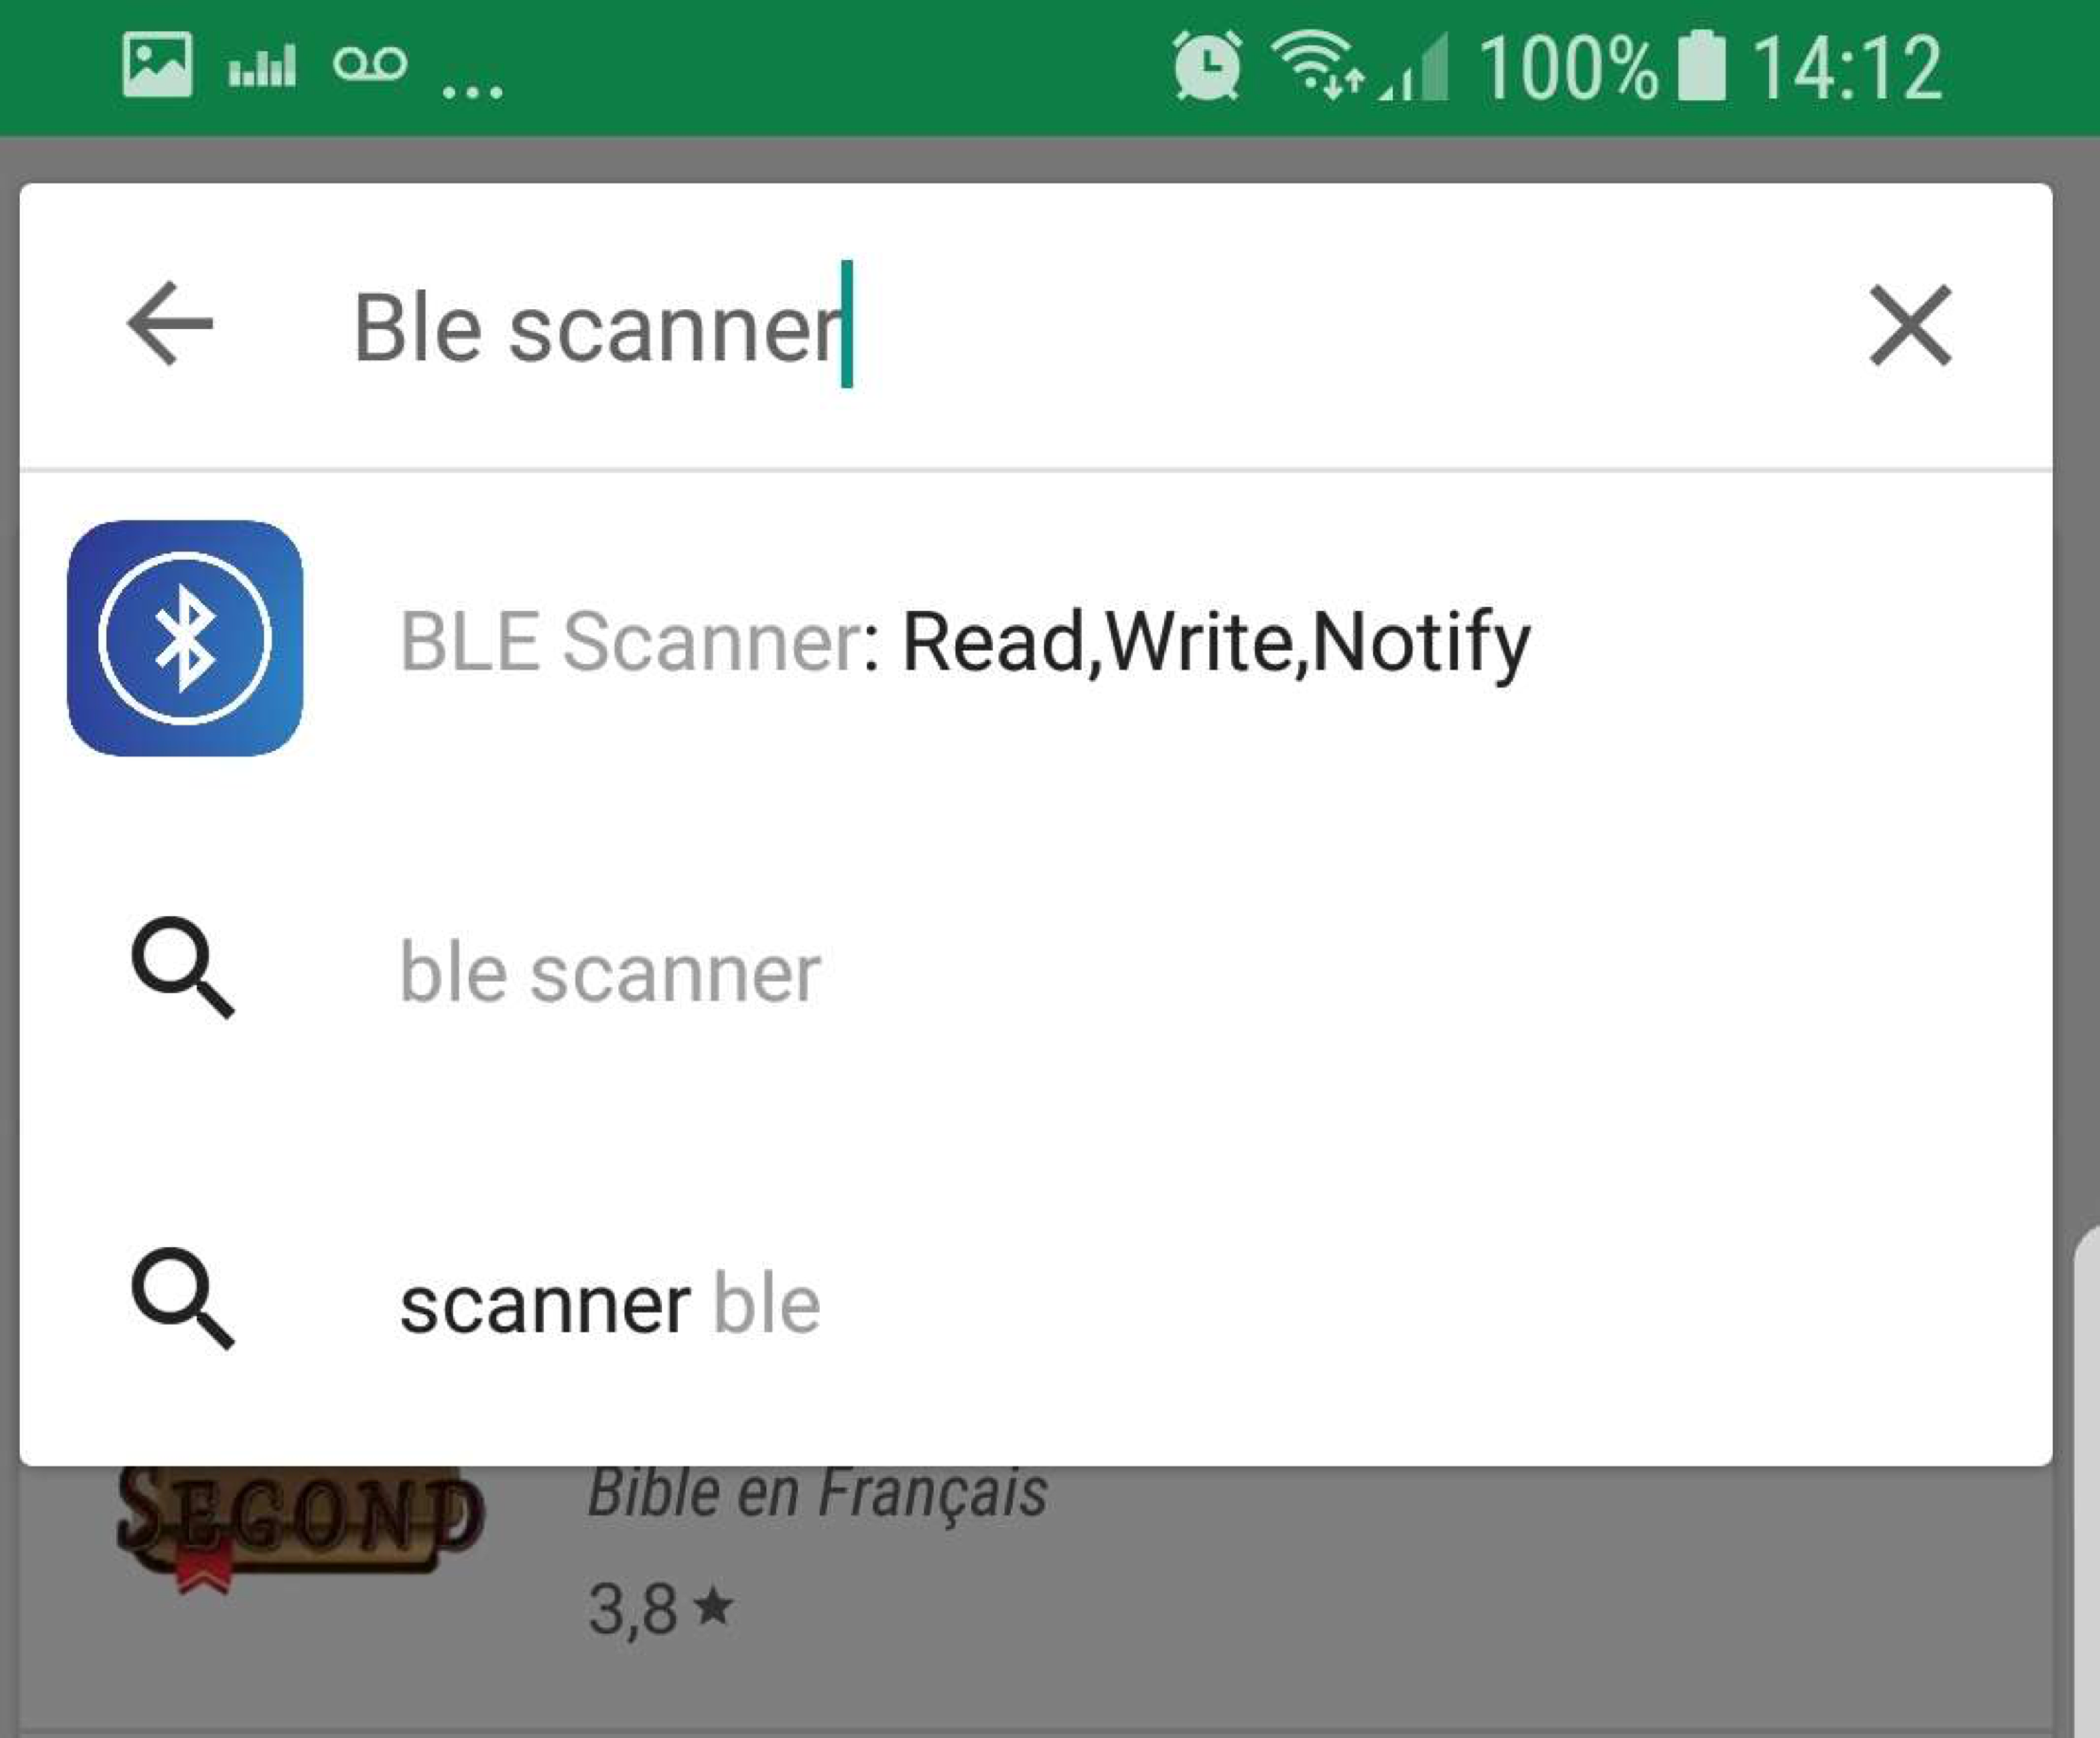
Step 1. Go to App Store or Google Play Store, find and download BLE Scanner App.
Step 2: Turn your Perifit on. You should see the green led blinking fast.
Step 3: Open BLE Scanner and turn on Bluetooth on your Phone. You will see a list of nearby Bluetooth devices including Perifit (if you don't see any Perifit try restarting Bluetooth). Send us an email if this step fails.
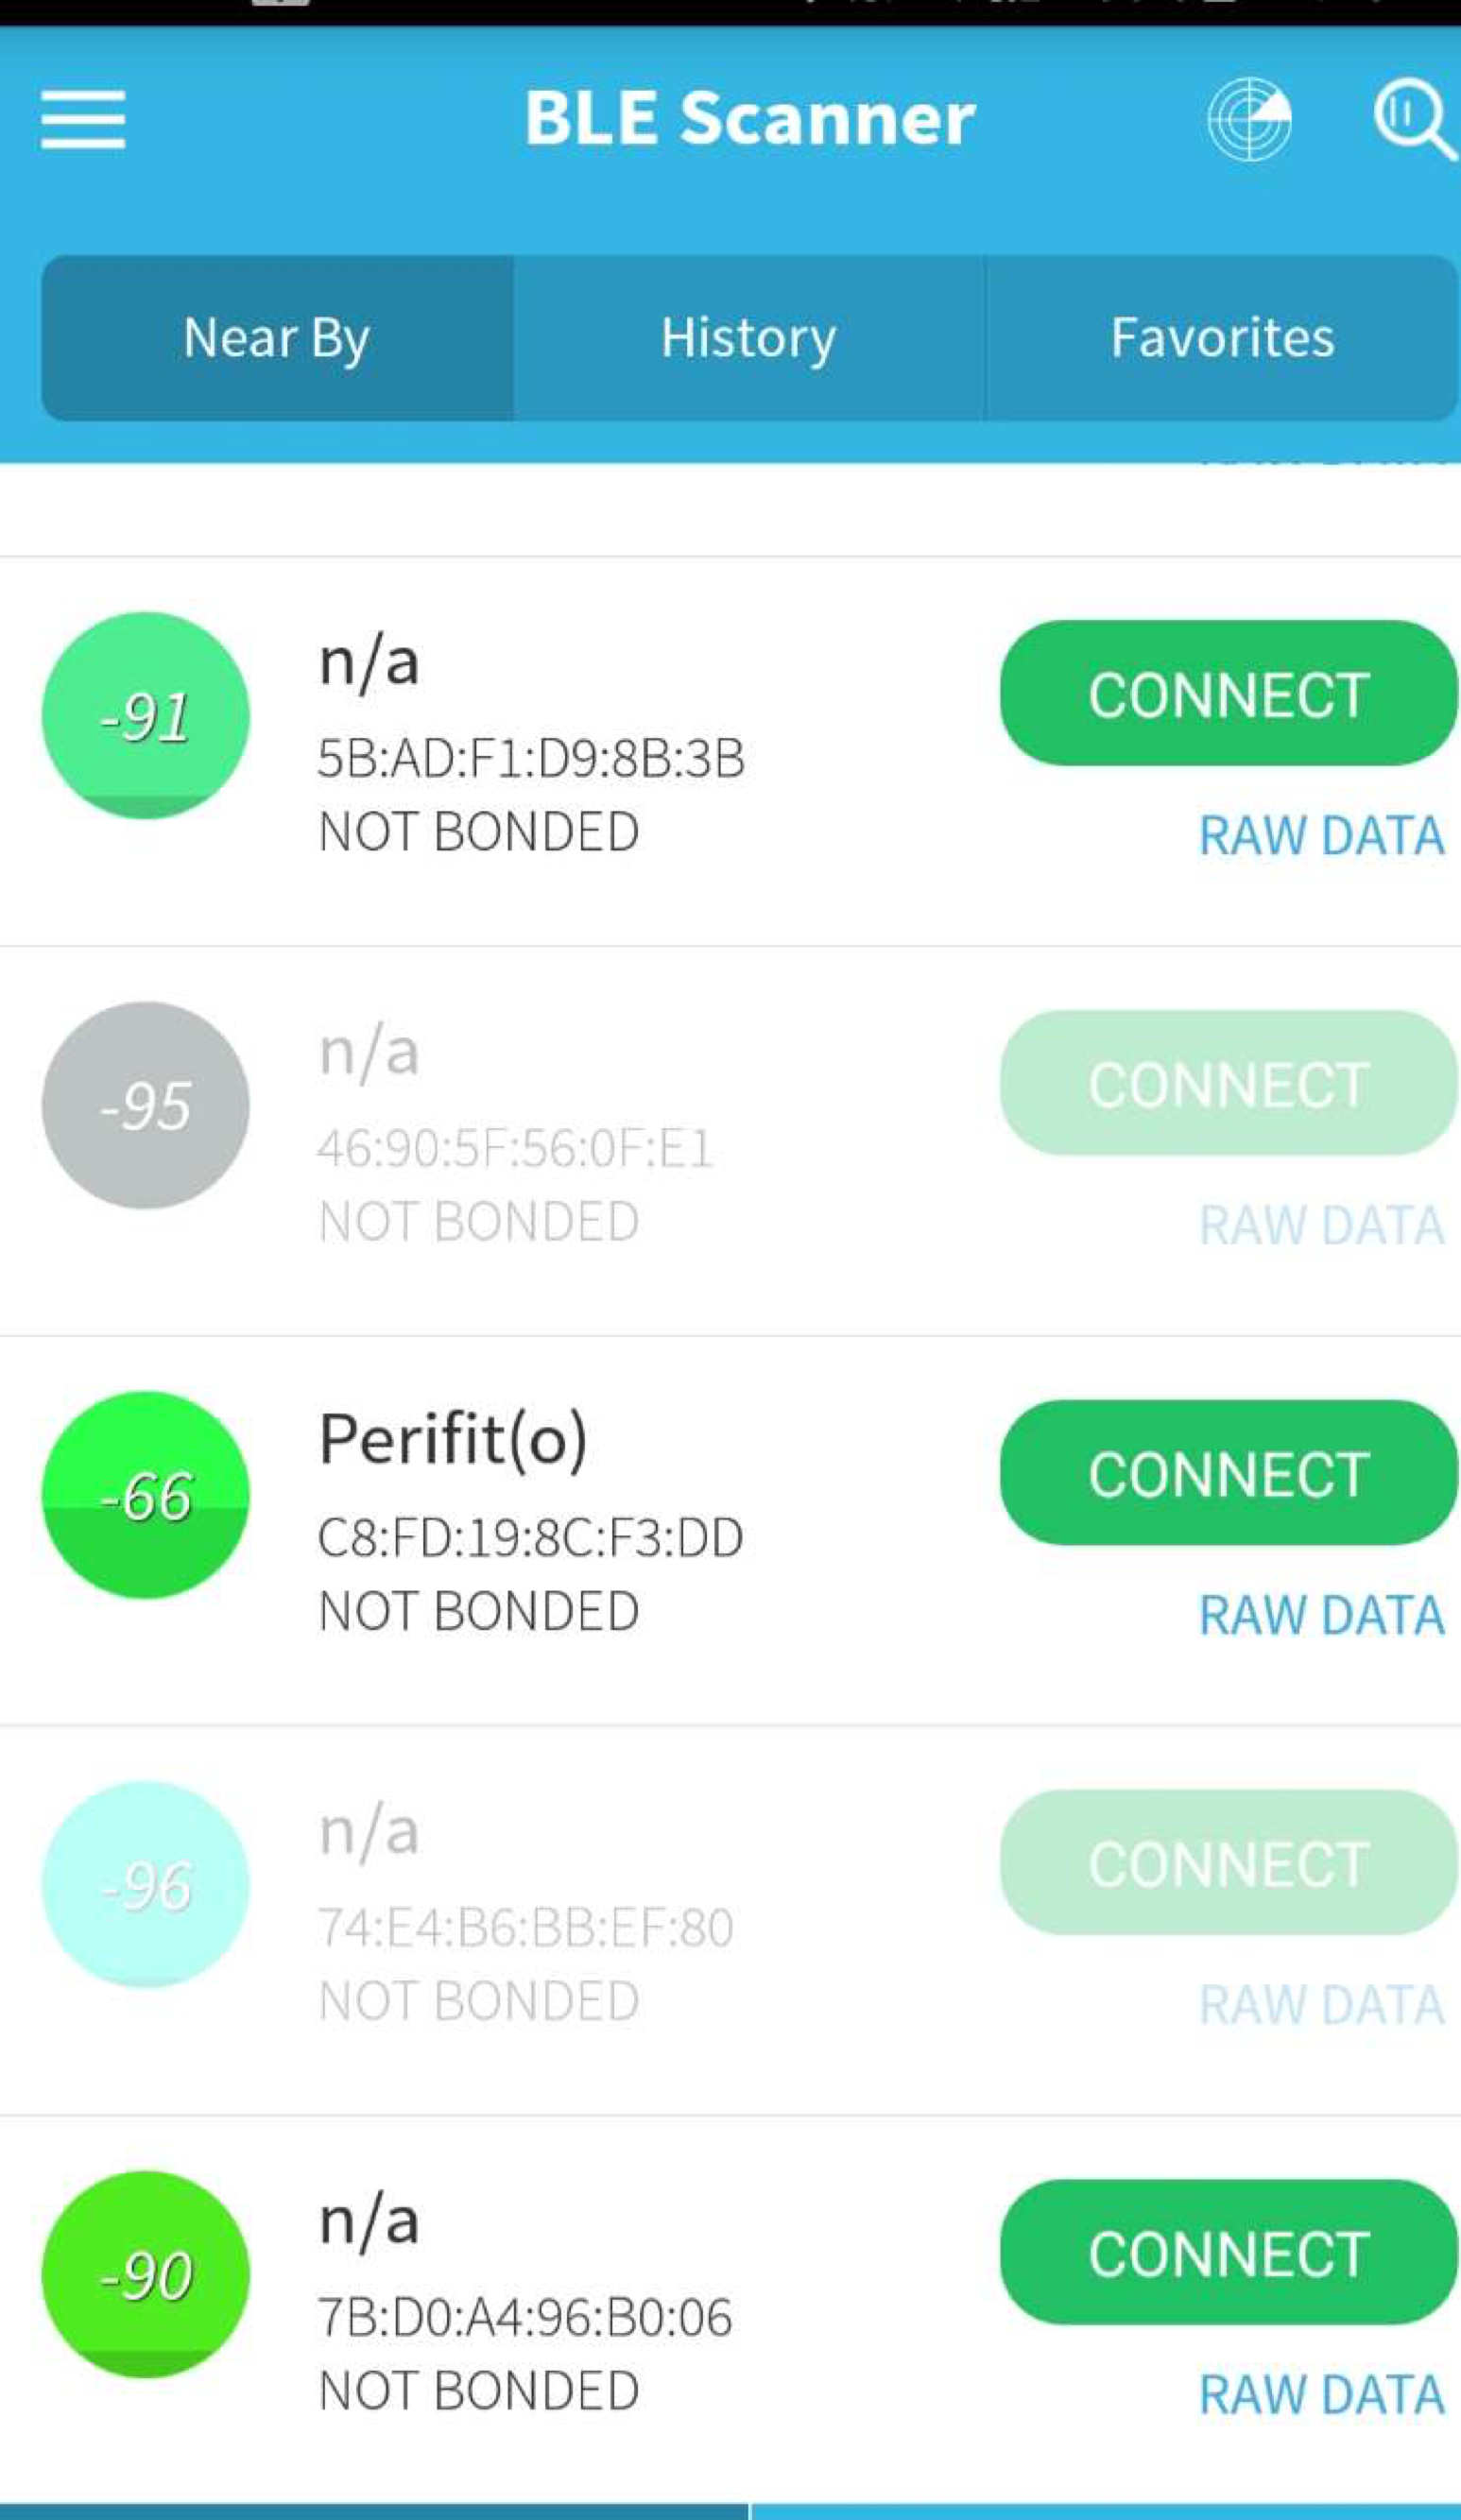
Step 4: Click on "Connect" button next to the Perifit device. You will notice a list of "Services". Find out the one called "Device Info Service" and click on it. Send us an email if this step fails.

Step 5: click on the small R button next to "Hardware Revision String" and "Firmware Revision String". Some numbers will appear below these lines. Just take a screenshot of what you see and send it by email to our dev team.
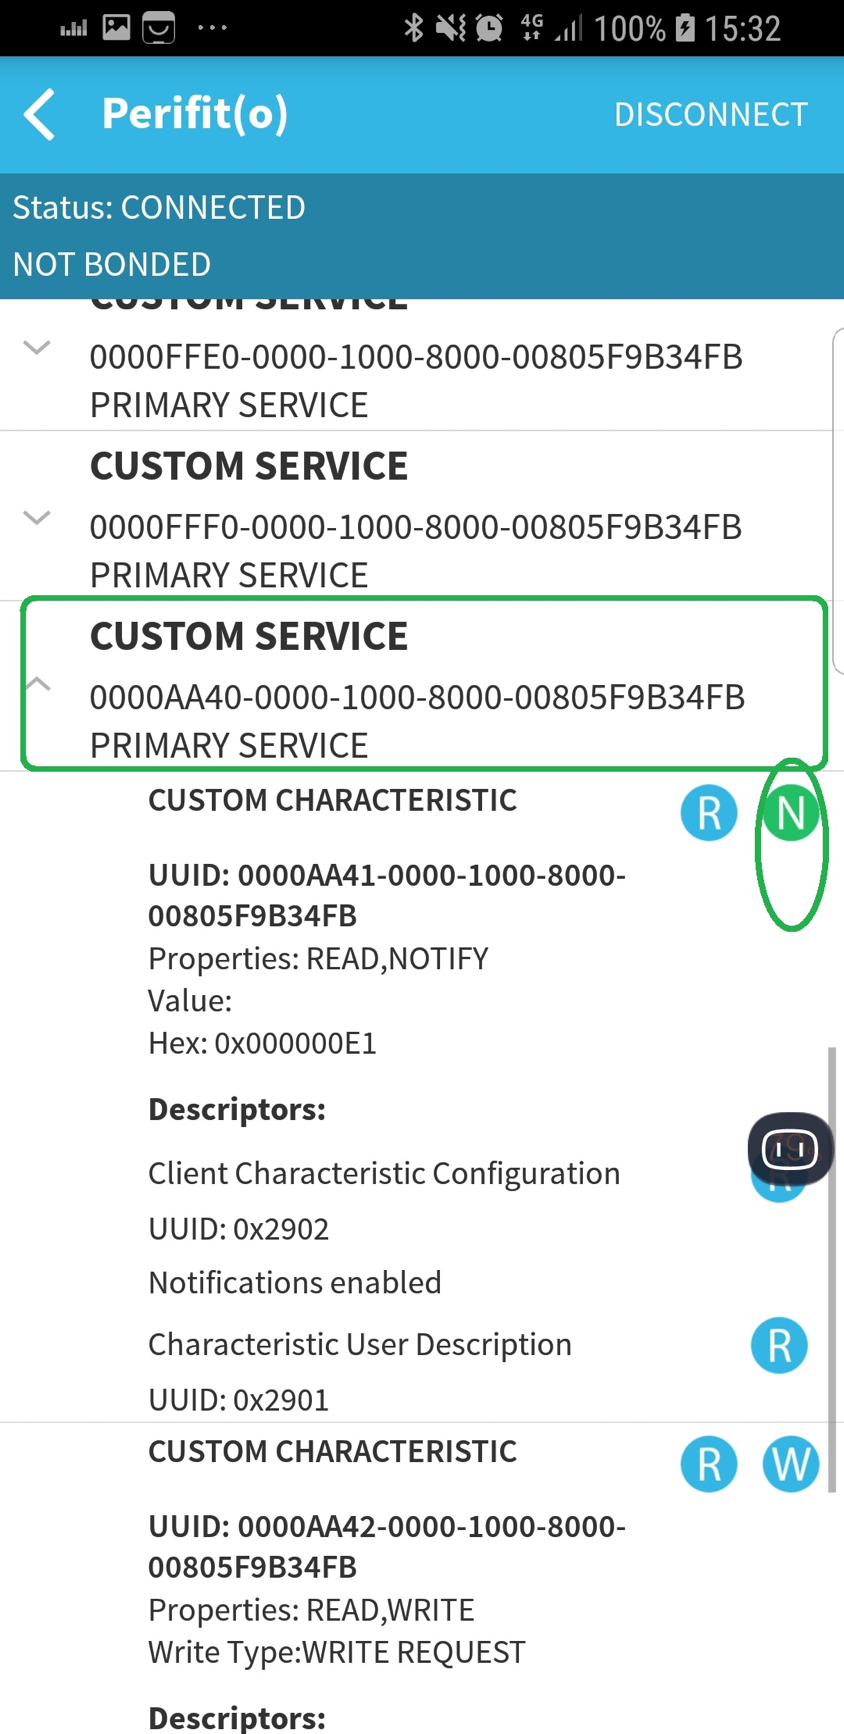
Step 6: close the Device Information Service and locate the "Custom Service" with UUID starting with 0000AA40. Then click on the small "N" button underneath and take a screenshot of what you see.
Step 7: Send the screenshots you made to app@perifit.co.
Thank you very much for your help with solving this issue!